Arbeitsgruppen/HW4F/Installation
Installation
PCs
Fujitsu Esprimo
Bios Passwort zurücksetzen
Fujitsu Lifebook E751
Bios Passwort zurücksetzen
Easy step on Fujitsu Laptop for remove BIOS password
- On boot screen Press
F2. You must be in Bios setup screen which is (Phoenix SecureCore(tm) Setup Utility) - Attempt to login using the following passwords, which are all returned to be invalid but part of the recovery procedure.
3hqgo3jqw5340qww294e
- Do not enter any other BIOS passwords, until you get the master password.
- Enter the hash code to a BIOS password generator site
- Reset the system (with a long push to the power button) and enter the generated password to access BIOS. PLEASE USE EN_US QWERTY KEYBOARD LAYOUT! ;-)
- You should be able change the settings. Make sure
- Supervisor Password
- to remove the password on Hard Disk and
- Use the generated password as your current password to clear the Supervisor Password
HP Prodesk 600
Netzwerkboot aktivieren
Schritte im Bios
- Security > Networkboot > on
- Advanced > Option Rom Policy > PXE Option Roms > umstellen von "do not launch" zu "legacy only"
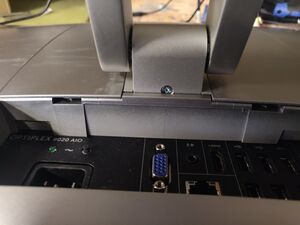
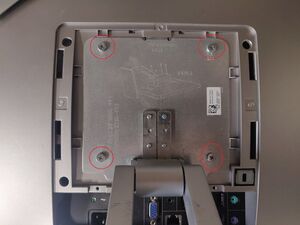
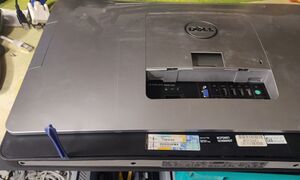
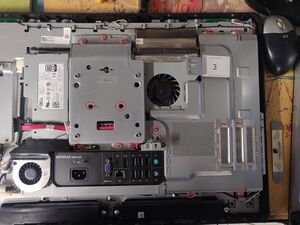
Dell OptiPlex 9020 All-in-One
BIOS-Passwort zurücksetzen
7. PC mit Strom versorgen
9. Wenn Betriebssystem geladen hat oder "Insert Boot Media" Meldung kommt Rechner über Powerbutton wieder herunterfahren
-> BIOS Passwort wurde zurückgesetzt
10. E49 Jumper wieder stecken
Optional:
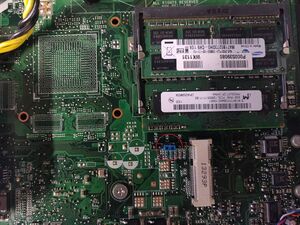
RAM erweiteren
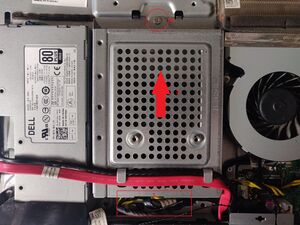
Festplatte tauschen
Anschließend Festplatte im Käfig tauschen
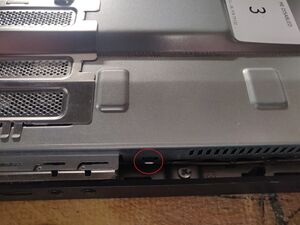
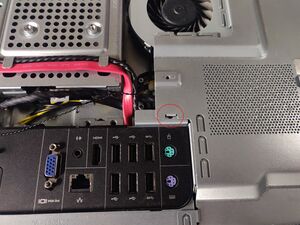
Zu beachten beim Zusammenbau
Zusammenbau dann in umgekehrter Reihenfolge
Laptops
HP Compact 6735S
WLAN Firmware installieren
sudo apt update
sudo apt install firmware-b43-installer
sudo reboot
Hinweis: Hardware WLAN Killswitch links neben dem Einschalter muss "blau" leuchten.
HP 520G
Bios-Passwort zurücksetzen
mit F10 ins BIOS gehen
dreimal leeres Passwort <Enter> eingeben
es wird ein String der Art i12345678 ausgegeben
alles (Groß/Klein des "i" beachten) eingeben bei
https://www.biosbug.com/hp-8-digit-new/
Rechner neu starten und BIOS mit der Zahlensequenz öffnen
Passwörter löschen, an vielen Stellen auf Legacy und PXE umstellen
Lenovo
Vielleicht hilft es:
Lenovo mit AMD A9 APU
Boot durchführen
Damit der Boot überaupt klappt, muss nach dem Start auf ESC gehämmert werden, um dann im Menü den Bootmenü-Eintrag so zu bearbeiten, dass die Zeile, welche mit "linux" beginnt, am Ende noch amdgpu.dc=0 beinhaltet.
Änderungen durchführen / Fix anwenden
Hinzufügen von amdgpu.dc=0 in /etc/default/grub in Zeile von GRUB_CMDLINE_LINUX.
Danach MUSS sudo update-grub ausgeführt werden, damit die Änderungen an der Bootconfiguration übernommen werden. Ansonsten werden die Änderungen nicht angewendet und wir müssen nochmal mit "Boot durchführen" starten.
Windows Powershell
Ist nicht die schönste Lösung! :-D
Powershell Skript herunterladen (Link speichern unter):
https://git.dezentrale.cloud/drbroiler/HW4F-Windows/raw/branch/master/installchocowithtools.ps1
Im Startmenü Powershell "als Administrator ausführen"
In das Download Verzeichnis wechseln (in dem das heruntergeladene Skript liegt) und prüfen welche Dateiendung das Skript hat (evtl. .txt)
cd \Users\user\Downloads
Die Ausführung von Powershell-Skripten ist in der Powershell untersagt, daher muss die Ausführungsrichtlinie geändert werden.
Set-ExecutionPolicy Unrestricted
Frage mit "A (Ja, alle)" beantworten
Powershel Skript ausführen
.\installchocowithtools.ps1
Frage mit "M (Einmal ausführen)" beantworten
Zusatz HDD
Eine Root-Shell ergattern mit.
sudo -s
Und folgendes Skript in diese Shell einfügen.
#!/bin/bash
MPATH="/media/zusatz"
LABEL="zusatz"
[ -d "$MPATH" ] || mkdir -v "$MPATH"
lsblk
DEVICE="$(lsblk -po +ROTA| grep -E '/dev/sd.+disk.+1$'|cut -d\  -f1)"

echo -e '\n\n'"Partition and format device:"'\n'"'$DEVICE'"'\n'

read -p "Please confirm: " CONFIRM
if grep -qiE '([yj]|(yes|ja))' <<< "$CONFIRM"; then
for ((i = 3 ; i > 0 ; i-- )); do
        echo -n "Waiting $i";
        sleep 1;
        echo -ne '\r'
done
### ISOLATE ERROR ON MISSING PARTITIONING TABLE
parted -s "$DEVICE" -- \
        unit MiB \
        print free
parted -s "$DEVICE" -- \
        unit MiB \
        mktable gpt \
        mkpart primary 1 -1 \
        print free \
        quit
### WAIT FOR BLOCK LAYER
sleep 1;
mkfs.ext4 -FL "$LABEL" "${DEVICE}1"
### WAIT FOR BLOCK LAYER
sleep 1;
UUID="$(lsblk -no UUID "${DEVICE}1")"
[ -n "$UUID" ] && \
echo "UUID=$UUID  $MPATH ext4 defaults,noatime  0  0" |tee -a /etc/fstab
findmnt --verify
mount -av
chown user:user "$MPATH"
else
        echo "Doing nothing!"
fi
